(37 Months)
I've been wanting to do this project for over a year now (there are step-by-step directions at PlayCreateExplore). We tried working on this last year (see here), but it morphed into a shaving cream sensory bin (instead of an art project). They liked playing with shaving cream so much, that we decided it would be fun to make shaving cream paint to use in the bathtub (see here). So now with Easter a few days away, and no new Easter art projects on our walls and windows- it's time to get busy.
This project couldn't be simpler. Instead of white card stock, we used pink, light blue and light green construction paper. Other than that, we followed the directions and were incredibly impressed with the results.
Step 1- spray shaving foam into a jelly roll pan (a rolled cookie sheet).
Step 2- spread it out evenly (I used my hand)
Step 3- add your favorite drops of liquid food coloring
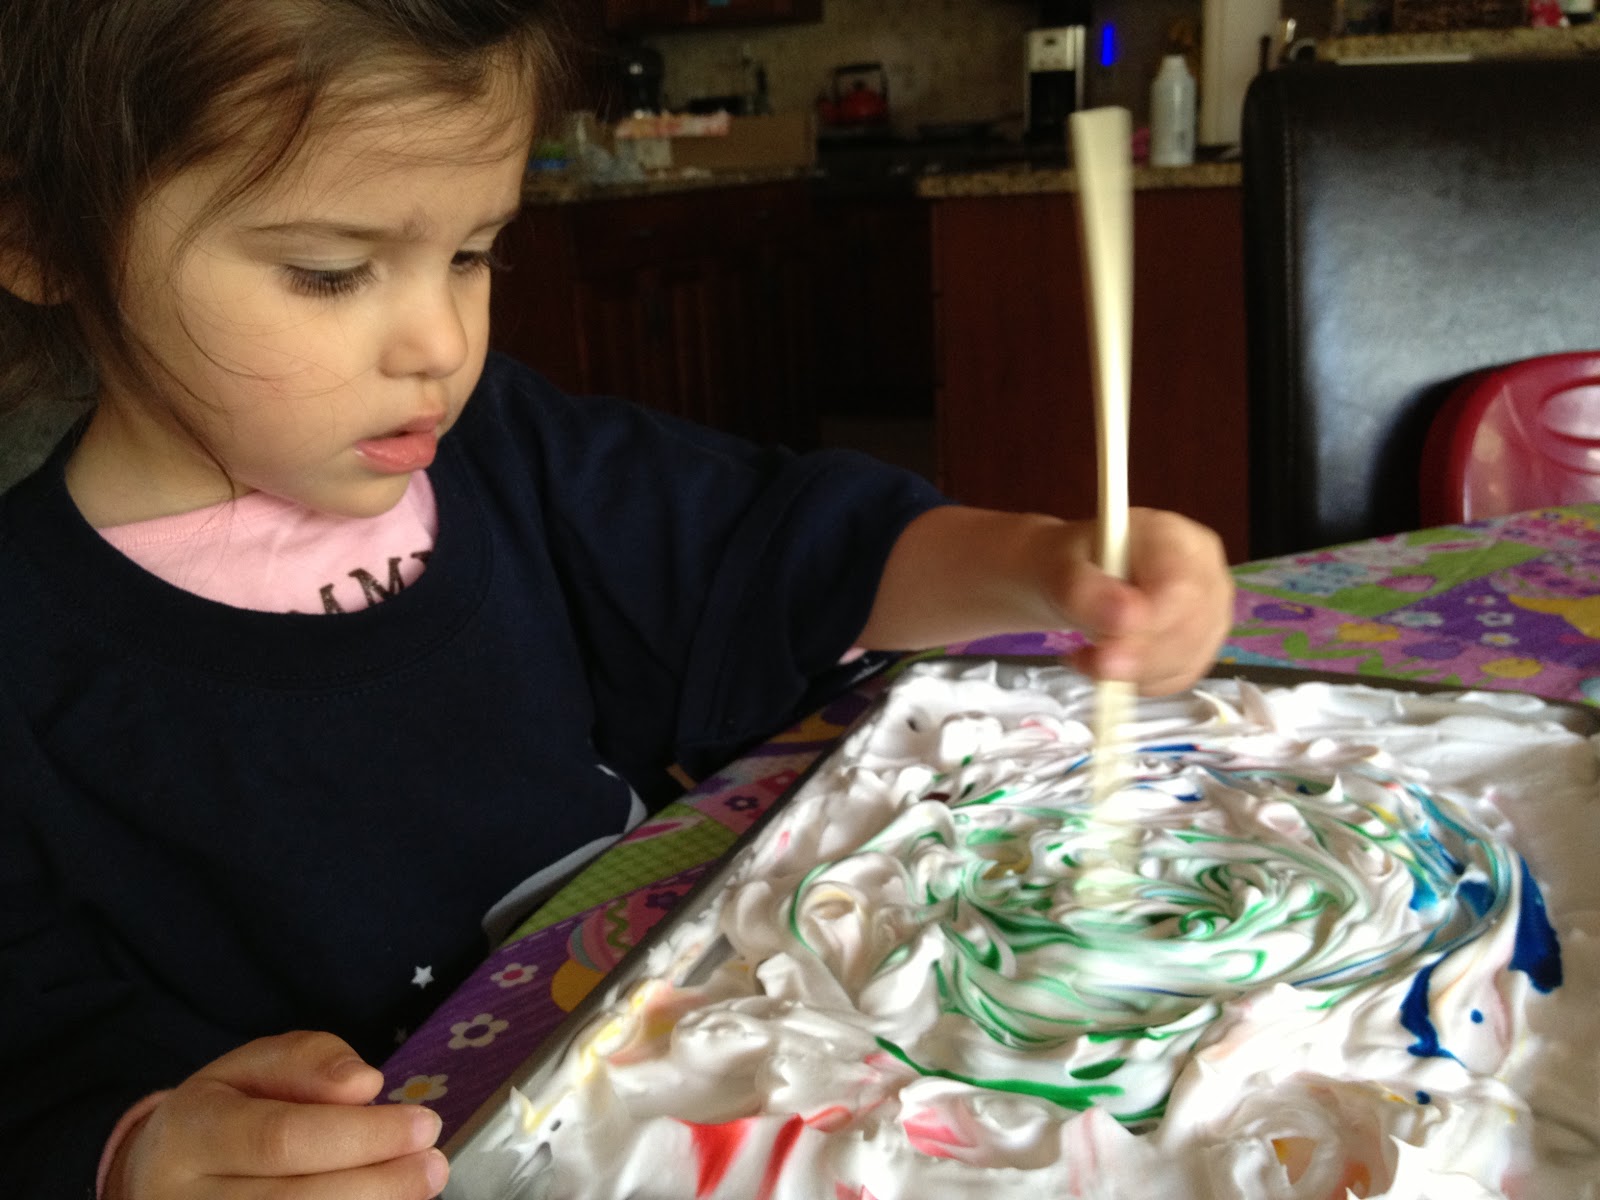
Step 4- swirl with a chopstick or the back of the paint brush (see Little Miss demonstrating below)

Step 5- place card stock or construction paper on top of the swirled shaving cream
Step 6- gently peel the paper off of the shaving cream and set aside
Step 7- add five or six more drops of food dye and swirl, repeat steps 5 and 6
Step 8- we waited five minutes before scraping the shaving cream off of the paper, we used a wooden craft stick
Step 9- set aside to dry (see tips below)
Step 10- Enjoy your gorgeous artwork.


We did learn a few tricks during our exploration into swirl art:
1. Six drops of food coloring wasn't nearly enough- we used nine and that was perfect.
2. You can reuse the same tray of swirled art at least twice, just add three or four more drops of food coloring.
3. Make sure you rinse off the craft stick and then dry it before each swipe of removing the shaving cream from the paper.
Here are our (mostly) finished products. I just don't have the heart to cut into these to turn them into Easter eggs.


We'll definitely be doing this again and again. Thank you again to Play Create Explore for introducing us to a wonderfully creative art project.
No comments:
Post a Comment