Wednesday, June 27, 2012

Shiny Star Sticker Sorting

(28 Months)

With the Fourth of July quickly approaching, I thought it would be fun to break out my metallic star stickers.  We originally used this circle template to practice drawing circles.  Since I had three copies left over, I used two of them with the idea of having the little ones place the stickers on the "tracks" of the circle.

Little Miss really liked this.  I knew she would, it involved something teeny tiny and stickers.  I peeled the back off the sheet of stickers before handing the sheet to the kidabunks (when I interned in first grade, the teachers did this to help prevent frustration in peeling off a specific sticker).  Little Miss went straight to work lining the tracks with stars. Wild One came over and gave it a try for a few minutes, but then wanted to play Red Rover again.

While I was watching him play Red Rover, I noticed Little Miss peeling the stickers off of the tracks and putting them in the middle of the circles.  Hmmm.  I decided to narrate what she was doing as she was working.  She just repeated me, in a trance-like state, and then it hit me, she's sorting the stickers by color.  Why didn't I think of that?  I could have drew a red line on the first circle and asked her to place all the red stars on the red circle tracks, and repeated it with the blue, gold and green stickers.

In fact, that's just what I'll do and then in the middle I'll write the name of the color.  Thanks Little Miss for an excellent lesson idea.

Tuesday, June 26, 2012

Red Rover, Red Rover Let the LETTER A Come Over

(28 Months)

We've been integrating some old school games into our play over the past few days.  One of our favorites is Red Rover.  Do you remember this one, "Red Rover, Red Rover let Suzie come over" and then Suzie runs to the speaker?  In the beginning I needed to remind them to wait and be patient until it was their turn.  That quickly switched to anticipation, especially when I'm hesitating and using my "I'm thinking" sign. While they were giggling and running and laughing to the point of hiccups, I had a wonderful idea.  Let's integrate some I SPY with letters.

Red Rover, Red Rover let the letter T come over.  Then the kidabunks would scramble around their table looking for the letter T.  It was so cute to watch.  Plus it was simple to set up.  I chose ten letters to pull from (I didn't want them to have to search through 52 letters to find the letter that I was calling out) and then grabbed our magnetic letters and Leap Frog letters.  Placed them on their table.  Rolled a work mat for the kids to jump over (they love jumping) on their way to me, and we were all set.  Easy, peasy.
I would have loved to share pictures of the kidabunks playing, but every single picture was blurry- they move too fast.

This game was so much fun, for both them and me!  Plus, think of all the adaptions that could be made: by asking for one of the below to "come over":
  • letter sounds 
  • names of specific animals
  • objects that begin with a certain letter
  • objects of a certain color
  • shapes
  • numbers
This game is excellent for following directions, listening skills, identifying upper and lowercase letters, gross motor skills and patience.  Most importantly, they really like this game.  We played it three times today!  

Monday, June 25, 2012

My Baby Girl is Now in a Big Girl Bed

(28 Months)

My Little Miss made the transition from crib to toddler bed last week (June 20th- this post has been sleeping sounding in my draft bin, at least something is sleeping soundly).  Deep, heart wrenching sigh.  With every new milestone, I'm reminded of how quickly they are growing up.  They were once my itty bitty babies, in these teeny tiny premie-size diapers, we were tracking on forms how many mL they drank (not ounces, but mL).... Now, we can have conversations, we eat big people food, sit on big people chairs, only use diapers for naps and bedtime, recite books and songs that were somehow memorized.  Somewhere along the way they went from babies to toddlers and now to little kids.  Everyone told us that "it's (the baby stage) goes by fast" but I didn't think it would end so quickly.

While I am so very proud that my little girl is ready and sleeping in a big girl bed, I'm so sad that she's ready and sleeping in a big girl bed.  It's happening too fast.  I wish I could keep them little for just a little while longer (and that's coming from a stay-at-home mom who's with them all day, everyday).


When we brought Little Miss into their bedroom to see her big girl bed, she was so excited.  "I'm going to sleep in my big girl bed."  Little Miss and Wild One immediately climbed right into the bed and they both laid down in it side-by-side.  She was so happy.  She kept talking about her big girl bed for the rest of the evening.  To prepare her for her big girl bed, we laid out her toddler comforter on the floor and let her nap on the blanket.  After  a few days of napping on the blanket (she didn't want to nap on her mattress on the floor), and not getting off the blanket until we came to get them, we knew she was ready for her toddler bed.

That first night, we left her toddler comforter (we call it "the magic blanket", I don't know why we named it that, but we said it once and it stuck with them) on the floor, and told Little Miss if she changed her mind and didn't want to sleep in her big girl bed that she could sleep on her magic blanket. We checked on her throughout the night and she stayed in her bed.  In the morning, we waited about 15 minutes before walking into their bedroom to see if she would get out of bed, but she stayed laying down in bed.

What about Wild One?  He's living up to his nickname.  He wants his big boy bed, but it's very hard for him not to get off the magic blanket.  He's so sneaky, when he hears me approaching his room he makes a mad dash for the blanket, and stares at me with a look of "who me?  I'm innocent."  He's two and he's already this cunning.

Tuesday, June 19, 2012

Snuggle Bunnies

(25 Months)
Look what I found in my Draft folder!

Please don't get me wrong I like the Easter Bunny, but I LOVE my Snuggle Bunny!
Happy (almost) Easter!  I love how happy and giddy my kidabunks are.

Monday, June 18, 2012

Chocolate Peanut Butter Pudding

(28 Months)

Wild One is still on a streak of barely eating any protein sources.  He'll eat a little bit of egg, chicken, and steak - but, not nearly what would be considered a serving (probably closer to a half of a serving).  He loves his milk though and he really, really loves his peanut butter.  He loves peanut butter so much that awhile back I posted his favorite peanut buttery snacks.

Today, I decided to make a fancy schmancy peanut butter pudding.  It's so thick and creamy, and delicious and HEALTHY, and easy to make.

Serves two toddlers or one hungry mommy.
1/4 cup of plain Greek yogurt
1/4 cup of creamy peanut butter
3 tablespoons of unsweetened cocoa powder
2 tablespoons of raw honey
1/2 teaspoon of cinnamon

Combine all ingredients in a medium mixing bowl.  Add more honey if desired.  Serve happily.

If you let it sit in the refrigerator over night, it thickens to a decadent, chocolatey dessert- similar to the inside of a truffle or a chocolate mousse cake.

Of course you could always had some delicious embellishments to this to make it even more fancy schmancy- like sprinkles, powdered sugar, edible glitter or mini chocolate chips, but this guilt-free dessert/snack really doesn't need it.  Enjoy!

Friday, June 15, 2012

Rainbow Bubbles and Glow Sticks

(28 Months)

A water table is so much fun.  A water tables with bubbles is even more fun.  A water table with RAINBOW bubbles - well, it causes hiccups from laughing so hard!  This is our second time playing with rainbow bubbles, it always causes instant smiles, squeals of immense joy, and the laughter that makes your heart just melt away.
How can something so simple as food dye on bubbles create this type of incredible reaction?  It's been said that "it's all in the little things", well that's definitely true.  To make a rainbow bubble table, we poured in about three big squirts (tablespoons) of bubble bath (from The Dollar Tree), then used the hose to make the bubbles nice and frothy.  The kidabunks chose their liquid food dye colors and began squeezing the bottles and making little droplets of color on the bubbles.  We played for awhile.  Then we tossed in a couple of glow sticks and glow bracelets into the water (the water turned a deep dark purple from all the food dye that the kidabunks added).  I wasn't able to get any good pictures of the glow sticks under the water though- I really need to spend time (HA!) learning how to use my camera.  The twins loved "diving" for glowing treasure.  We started out fishing for glowing treasure, but Wild One started flailing around the toy fishing pole and Little Miss was not happy with all the splashing.  
The dye makes the bubbles so pretty - it does temporarily dye skin (it washes off in the tub though).
 For some reason he didn't want to put down his squeeze bottle while playing with the bubbles.
We needed to make a new bubble table, because we lost most of our bubbles when we were splashing.    Which was all good for Little Miss because she convinced her brother to make a Pinkalicious bubble table this time.
Little Miss has a serious look on her face as she watches her brother pick up the hose- she doesn't like being squirted and splashed with water .  She's so concerned about what her brother is doing that she didn't even notice that she was pouring pink bubbles and water all over herself!

Wild One made a huge pink foam cupcake, but by the time I grabbed my camera he poured it out onto the palm tree in the background.  He said the palm tree was hungry.

Goop for Beginners

(28 Months)

Goop = Mess.  Mess = Fun.  Therefore as far as logic goes, Goop = Fun (look, we just did a logic puzzle at 28 months).
I've never played with goop before.  I've seen it on so many wonderful blogs, on Pinterest, I've heard the primary teachers talk excitedly about playing with it in their classrooms, and I've even seen a segment of it on Steve Spangler.  I was so excited to make goop with the kidabunks and Grandpa last week.  Here is a beginner's guide to goop.  It took me about five full minutes to make the goop.  My plan was to assist the kidabunks in making this, but it was a bit harder to combine than I thought.

  1. Most important- this stuff will separate over time and will clog your drains.  When you are all finished playing with the goop, scoop it into a recycled bag and toss it into the trash.  
  2. Gather your materials, we used:
    • one of our sensory bins (a 15 qt Rubbermaid tub with lid)
    • two boxes of corn starch
    • about four cups of water (to be added slowly to the bin)
    • wooden spoons, small spoons, cooking utensils
    • tempera paint (optional)
    • liquid food dye (optional)
    • bucket of clean water and a wash cloth (just in case someone doesn't like that feeling of the goop on his or her hands)
  3. Pour the two boxes of corn starch into your empty sensory bin.
  4. Add about three cups of water to the bin, combine with your hands (this is messy).
  5. Continue adding water as needed, the consistency should be like honey (we needed just under four cups of water).
  6. Add some paint to dye the goop (we used pink- as part of our Pinkalicious activities).
  7. Swirl the paint, either with hands or the wooden spoons.
  8. Add some fun liquid food dye colors to the bin.  Watch in amazement as the goop turns into a beautiful marbled slime.
  9. The kidabunks loved watching the goop ooze through Grandpa's fingers (new experiences help build vocabulary), and squeezing it into a ball and then watching it melt away, and slapping and poking the goop hard and fast so that their hands don't sink.  Wild One liked stomping on it and then relaxing his foot so that it was covered in goop.
  10. We made a huge mess in our lanai.  Once the goop dries it turns into a powdery substance, I was then able to just vacuum it off the outdoor rug and dispose of it.  
  11. Remember, if you pour this down the drain the plumber (and the plumber's family) will thank you.

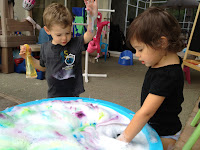
It's amazing, with all of the pink paint that we added to the goop it still turned green.
The kidabunks liked using squeezing the food dye into the goop.  
Little Miss kept saying, "tiny tiny bottle".  
She was rapt in determined concentration for almost an entire hour playing with this stuff.  
Squeezing it through her fingers, spooning it onto her tiny, tiny spoon, stirring it and swirling it, 
poking it with her fingers, watching her fingers sink into the slimy quicksand, feeling the force of the solution holding her hand down at the bottom of the sensory bin.
Now I know why so many tots and little kids love this stuff!

The next time, we'll add glitter and some water beads.
I'd also like to experiment with adding shaving cream to the goop.

Wednesday, June 13, 2012

Whole Wheat Blueberry Crumble - Baking with Grandpa

(28 Months)

Little Miss loves to bake muffins (which is good, because we eat a lot of muffins).  Last weekend, we decided to make a whole wheat blueberry crumble from Off the Shelf.  It had everything that a tot and a Grandpa could want, few ingredients, few directions and a quick cook time.

Slightly adapted from Off the Shelf's Whole Wheat Jamberry Crumble
  • 1 cup old-fashioned oats
  • 1 cup white whole wheat flour
  • 1 stick butter, melted
  • 1/2 cup brown sugar (I would recommend only using 1/4 of a cup, it was a bit sweet for us since we doubled the amount of preserves)
  • 1/2 teaspoon cinnamon
  • 1/4 teaspoon salt
  • 1/2 cup unsweetened coconut flakes 
  • 3/4 cup blueberry preserves (we used 1 1/2 cups- my daughter loves blueberries)
  1. Preheat oven to 400 degrees Fahrenheit. Butter an 8x8-inch pan.
  2. In a mixing bowl, combine all ingredients, except preserves, until the mixture is crumbly. 
  3. Reserve 1 cup oat mixture. Using hands or a rubber spatula, press remaining oat mixture firmly into prepared pan. 
  4. Spread preserves evenly over bottom crust. 
  5. Sprinkle reserved oat mixture evenly over preserves layer.  
  6. Bake for 20 minutes or until top crust is lightly golden brown. 
  7. Allow to cool for about 15 minutes, then run a sharp knife around edge of pan to loosen. Slice into nine bars and remove from pan, let cool completely. 
Grandpa was a bit skeptical at first, "I'm not a baker".  Little Miss quickly changed his mind with a simple"please Grandpa".   She's not even 2 1/2 and she has him wrapped around her adorable little fingers - the magic of grandchildren.
Grandpa and Little Miss went straight to work, measuring, pouring and mixing ingredients.  Look at those little fingers hard at work.  So busy concentrating on what she's doing.  Using those fine and gross motor skills simultaneously.  Listening and, more importantly, following instructions.  It was so precious to watch.  She had such a great time baking with Grandpa.  I have a feeling we'll be doing more of this.
I completely forgot to take a picture of the finished dessert- we started eating it right away.
We're already looking forward to baking these again.  The next time we make this, we're going to add some unsweetened flaked coconut to the crust and crumble and probably half the amount of brown sugar (it was a little sweet for us- since we doubled the amount of preserves).  Simple, delicious, and fun to bake.  What more can we want?

"Thank you Grandpa" ~ Little Miss

Wednesday, June 6, 2012

SCENTED Rainbow Spaghetti

(28 Months)


Dyed spaghetti is one of the most inexpensive, versatile and fun ways to practice honing our fine motor skills, while engaged in sensory play with the slippery, slimy, shiny strands of pasta.  Instead of just making rainbow pasta, we added some delicious extracts to enhance the sensory experience.  Scented rainbow spaghetti!
Easy peasy steps to making rainbow pasta:
Cook pasta according to directions, minus one minute - to make sure it's not too soft
Drain pasta
Add one tablespoon of light cooking oil to prevent sticking - we used canola oil
Swirl around the pasta with the oil
Separate the pasta into as many bowls as you want to make colors - my kidabunks chose pink, blue, yellow and green
Add six or seven drops of food dye to each of the bowls of pasta, toss to coat - the kids loved watching the pasta change into whichever color they were working with at the time.  I let them use their hands to mix the dye into the pasta, it will temporarily stain their hands though.
Now for the scents- we added 1/4 tsp of almond extract to the "pink, pink, pink" (pasta) as Little Miss calls it
1/2 tsp of vanilla extract to the yellow pasta
1 tsp of left over coffee to the blue pasta
1/2 tsp of cinnamon to the green pasta
The kidabunks loved everything about the rainbow pasta.  They loved watching the dried pasta go from hard, straight strands to the soft and pliable spaghetti.  They oohed and aaahhed as the steam rose into the air when I drained the pasta.  When I divided the pasta into the different bowls, they noticed that it was still steamy so they started blowing on it (so cute).  Wild One noticed that his "BIG" metal mixing bowl was warm, but his sister's big plastic mixing bowl wasn't (humph, leave it to the two-year old to add a bit of science to this part of the activity).  The part they liked the best was definitely the mixing in of the colors.  I'm so glad I didn't prepare this during nap time, they really enjoyed that part.  I loved when they were sniffing the pasta, and hearing the mmmmm sounds.

When it was time to play with the pasta, we cleared off the art table and their play kitchen work areas.  I set out two pots/pans for each of them, plus we put a pair of tongs in each of the rainbow pasta bowls.  They had so much fun pretending to cook, transferring it (sometimes with tongs, sometimes with their fingers sometimes with a pasta fork) from one bowl to another, mixing colors, separating strands, feeling the slippery texture of the strands, noticing that the strands break when pulled apart.  We played with the pasta for almost an hour!  An hour!  The kids smelled delicious after playing with this for so long. As you can see from the big smile, this was a H-U-G-E hit!
To store it, I placed it in ziplock bags.  The next time we play (probably tomorrow), we'll add some glow sticks and water beads.  I'm looking forward to eventually painting with the spaghetti.  Can you tell that we really liked this activity?