Monday, June 30, 2014

Frozen Themed Sensory Play

(4 Years)

"Really?  I'm guessing you don't have much experience with heat."
"Nope."

You can't help but sing along with the songs from Frozen- maybe because the kids sing it in the pool, while playing dress-up, in the bath, in the car.... you get the picture.

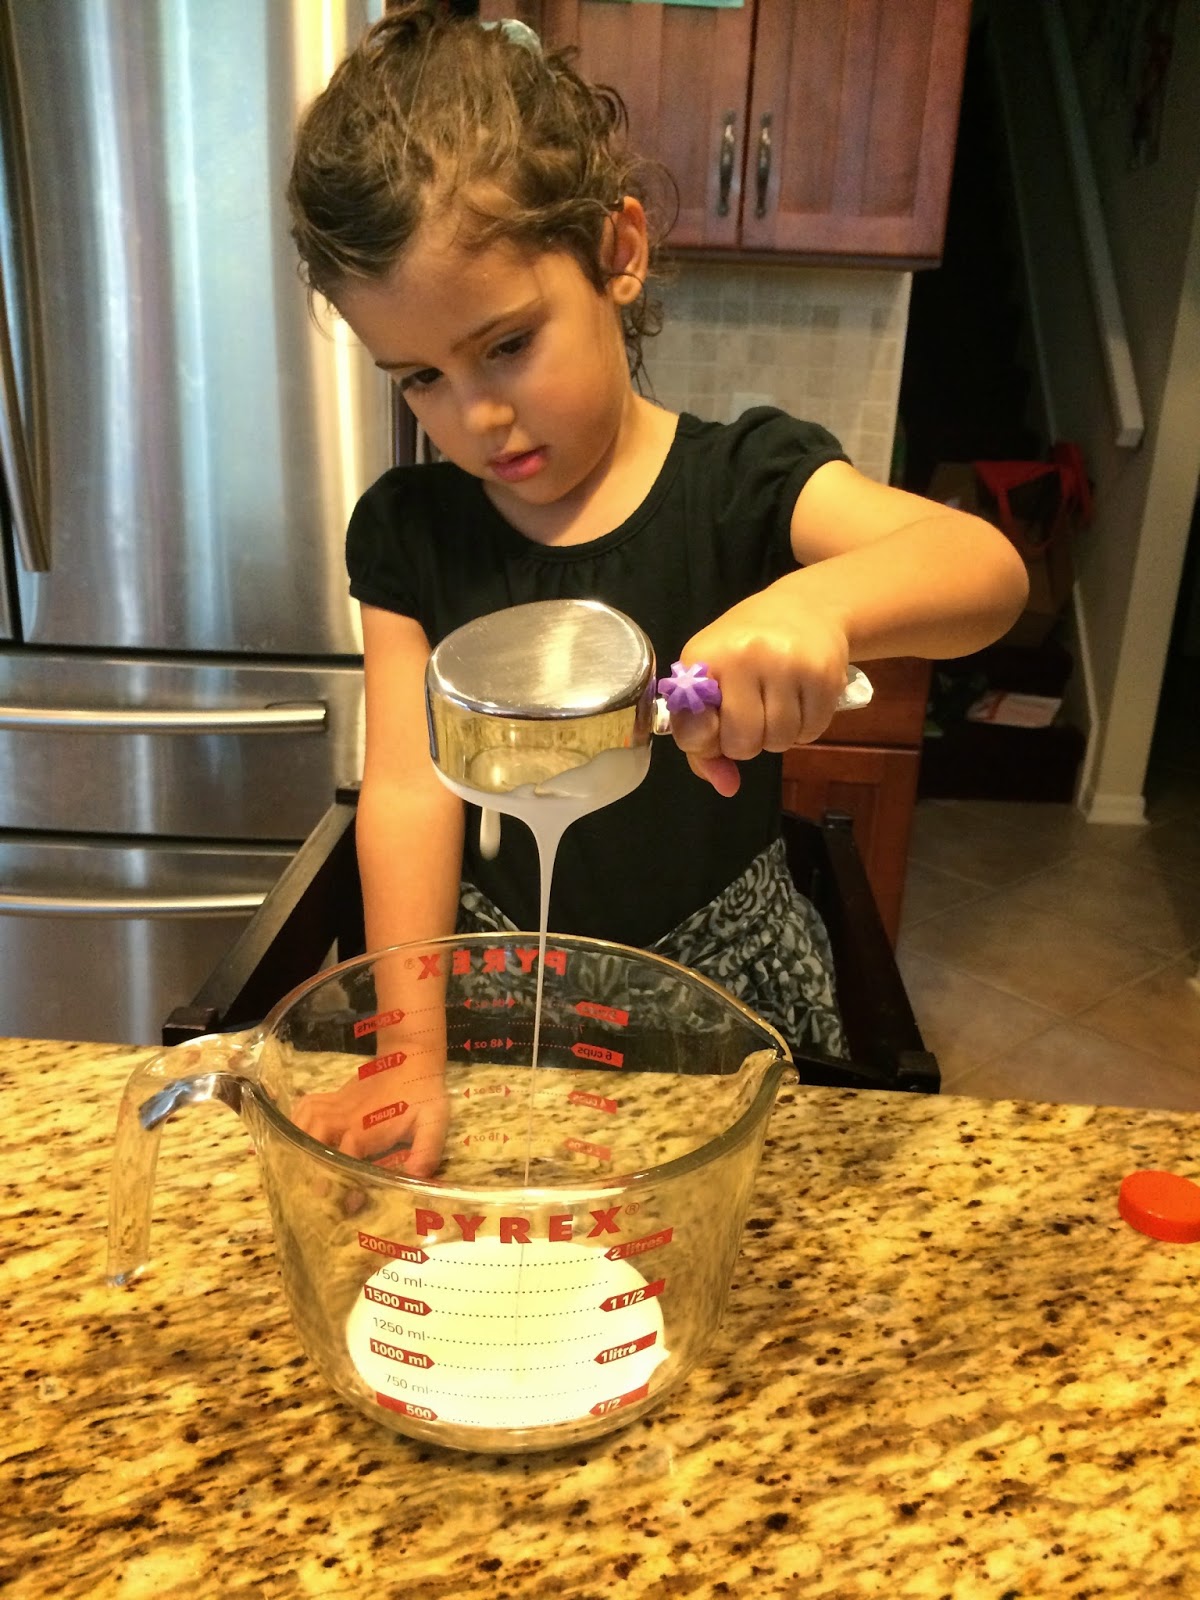
Well Frozen inspired this frozen sensory play.  We first placed a can of shaving foam in the fridge the night before to get it nice and chilly.  We then made three different colors of ice blocks- so the kids could pretend to be ice cutters (and builders) - it was supposed to be just shades of blues and purples, but I knew that Little Miss would really want pinks, so I made a batch of pinks also.  We used gel food dye, but liquid food dye and liquid watercolor works the same when making colored ice.

This type of creative play is just perfect for a HOT summer day.  They loved building and knocking down their ice creations.

Look at the concentration on their faces, so serious!  I love it!


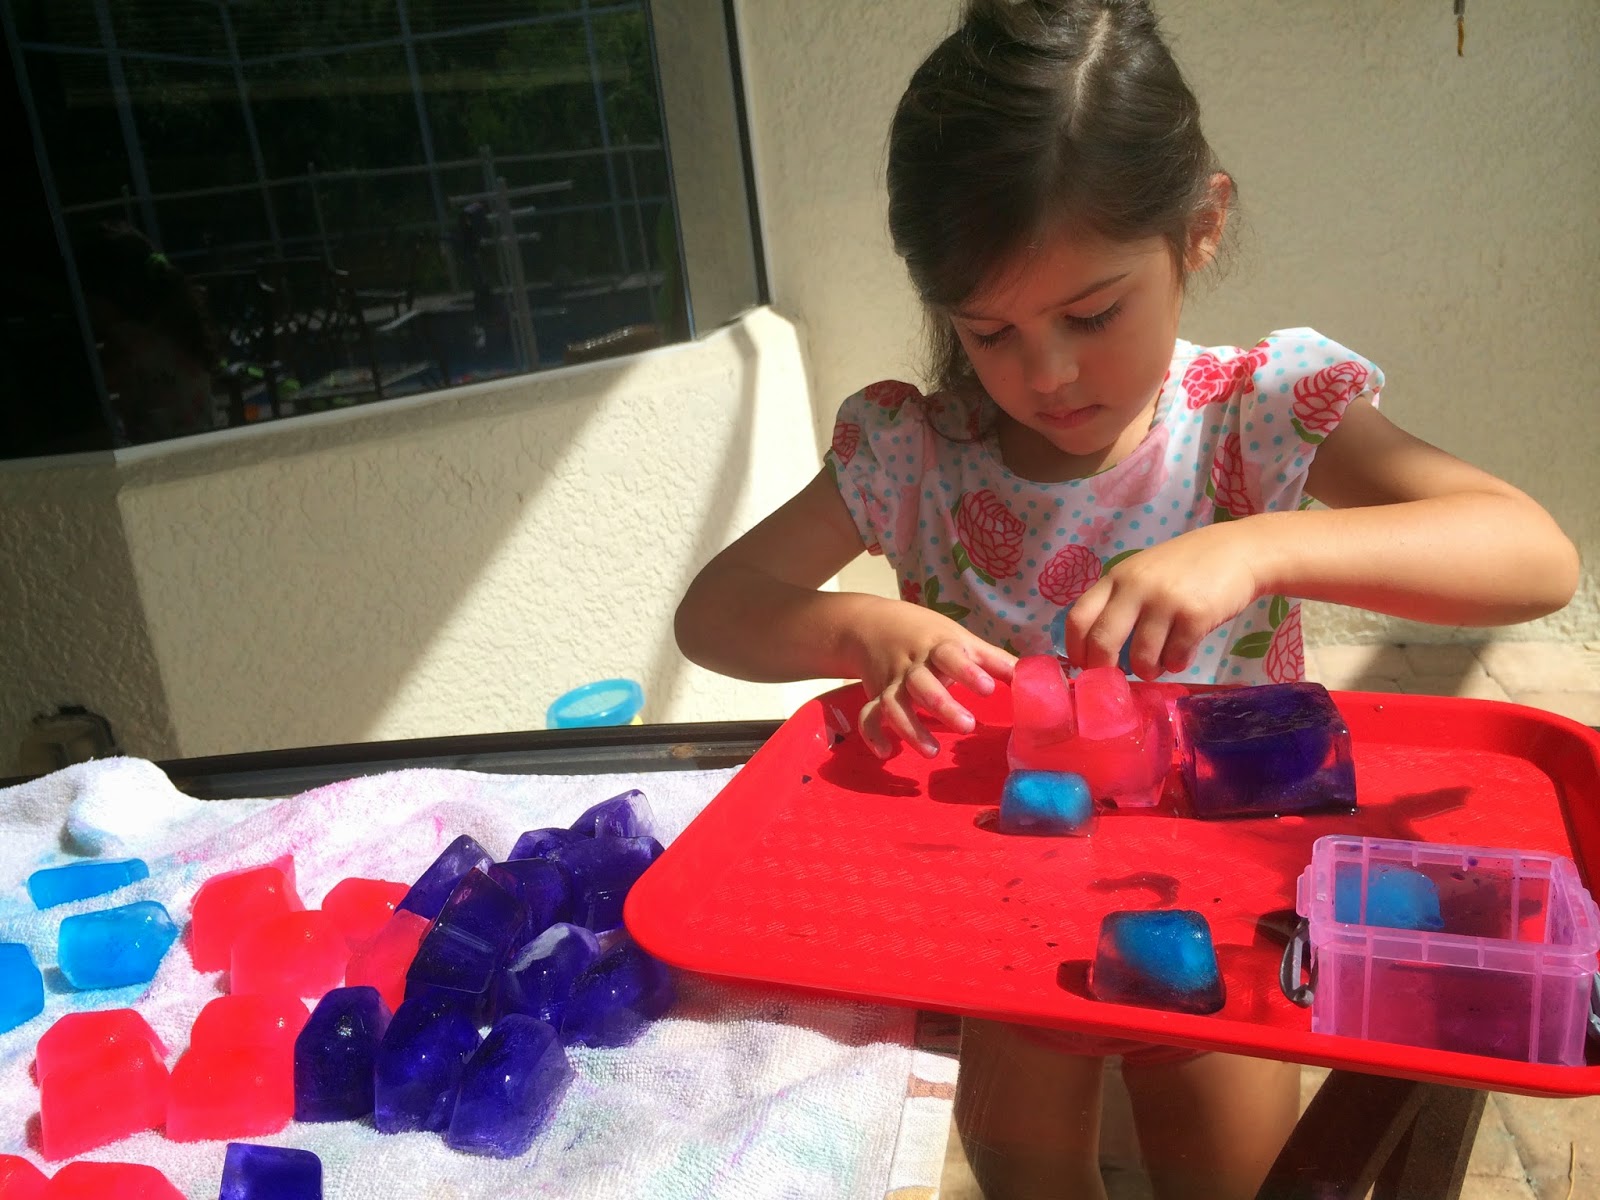
The colored ice cubes lasted a long time in the 90 degree heat.  In fact, it lasted so long that we brought out that can of cold shaving foam that I mentioned earlier.


"Foam!"  Anna, Elsa and Olaf also joined in on the fun.  The Frozen friends were buried in snow, an ice palace was constructed (and knocked down- ooops), they went sledding and ice skating, Olaf had his dip in the water - just like he always wanted.

They had so much fun playing with colored ice in the foam, it turned the foam beautiful shades of purple, blue and pink.
Clean up is so simple- hose it all down.  The shaving foam even made their trays and toys squeaky clean.  They played with the colored ice and foam for a little over an hour - the ice stayed all that time.  If you need a fun, easy and inexpensive activity, this sensory play is perfect for that HOT summer day.  

The kids asked to play with this again, next time we are going to add in some water beads for more sensory fun.  I love how easy this is!  Happy Monday

Friday, June 27, 2014

Soak the Sight Words

(4 Years)

We've been playing in the pool a lot lately, a lot!  It's just too hot or humid, or hot and humid to do anything that does not involve a pool, a sprinkler or being inside.    Wild One and Little Miss, like most kids - and adults, like playing with water shooters.  Instead of ME being their favorite target, I decided that we would soak some of their sight words.  The chalk gets a quick dunk in the pool to make the writing a deeper color, and off I went writing down sight words (we call them magic words, it's more fun!).  As soon as they saw me writing, I was bombarded with "What are you doing?  Mom, what are you doing?  Why are you doing that?  Is that for us?"

When I asked if they wanted to play a water shooter game, they were bouncing "I do!  I do!".  They quickly grabbed and filled their water shooters.  All they needed to do was be the first to pronounce the word that I pointed to (with a pool noodle, just in case their hand-eye coordination and aim wasn't as good at words as it is at me!).  That's it!  Let the game begin and they had a BLAST!

We played two rounds and then it was time to come in for lunch.  As they were drying off, they asked if we could do more words tomorrow.  Hmmmmm, yes!

Look how easy learning through play is!

Wednesday, June 25, 2014

Magic (Sight) Words Race

(4 Years)

I love finding and trying sight word games for my little ones (they are getting so big - sad sigh). We've done quite a few sight word games in the past (type SIGHT into the Search Box on the right and it will bring you to the games that we've posted).  This one is another wonderful Pinterest find - who doesn't love Pinterest.   It's from Pre-KPages.com and it only takes minutes to set up, plus you don't need to buy a thing.

We repurposed one of our giant die, by cutting out circles, writing a sight word onto each circle and then taping them onto the die.  Above is a link to my FREE activity sheet (just click the picture of the bar graph).  Go ahead, grab a giant die or one of your wooden cubes, trace, cut, write, tape, print, play!

The kids really liked playing this.  In fact, we only stopped because it was nap time.  Yes nap time, they are FINALLY napping.  It only took four years!  I had to promise that I wouldn't put anything away and that they could play (don't you love it?  "Play") with it again when they woke up from their naps.

Since we have more than one preschooler playing the game, we played like this:
I modeled how to play- roll the dice, read the word, stamp the correct location on the bar graph (yadda yadda).
I pointed to one of the words on the bottom of the sheet and asked the kids, "how to you pronounce this word?"  Wild One said the word first, so he got to roll first.
When the die lands, I would point to that word and ask how to pronounce it, the one who answers correctly first gets to roll the die next (after they make a dot on their sheet).

While we were "playing", we practiced some introductory math vocabulary.  I asked which column had the most dots, the least dots, the same number of dots, which two columns when added together equal the number eight...

I asked what they liked about the game- Little Miss said the Dot Markers, being first (to get the correct answer) and rolling the BIG die.  Wild One said playing games.  I just love that we have another game that they want to play in our rotation.

Monday, June 23, 2014

Rainy Day Treasure Hunt

(4 Years)

What to do on a rainy day, or a too hot and humid day?  Go on a quick and easy treasure hunt!  All that's needed is paper and something to write with.  Create a short list of items to find within the house.  Read them off to the kids and be prepared to be intrigued at some of the "treasures" that they find.  I found this idea from Smith Tales on Pinterest.  It looked so easy and to be so much fun, I had to give it a try.  I'm glad that I did!  Look what we did:

We began the game in the playroom where ALL of the treasures could be found.  However as soon as I read off each of the first items, Little Miss and Wild One ran OUT of the room in search of something that fits that description.  Where are they going?
Little Miss couldn't find an object for "something that moves".  Wild One ran to her room and grabbed her jewelry box.  "Look Tinkerbell moves when I wind her up!"  
In the playroom there were toy cars, a baby stroller, a red car that
they ride on almost every day...  I liked his out of the box thinking though!

Something heavy

Hee hee, fun and sneaky way to practice drawing circles and strengthening our fine motor skills.

It was hard to stay quiet during this game.  Especially when the objects were RIGHT in front of them!  However, I'm glad that we did stay quiet (good work Grandpa), because some of the items that they found I wouldn't have grabbed.
Something that begins with the letter C - Wild One grabbed a CD!

I made two slightly different lists, one for each of my children.  They liked playing the game so much that we decided to swap lists.  Now, instead of making an X inside the box (since there is already an X from the first round of treasure hunt), we drew a circle around the square with the X to indicate that she/he completed that item.  The only rule we had for the second round was that they had to discover a treasure that wasn't already found by the other person.

They LOVED this game!  Quick and easy to set up, out of the box thinking, think - pair -share (think of an item, get together with a buddy and share your answers), practicing writing, having fun.  Learning through play.  Hmmmm, what to do next?

Tuesday, June 3, 2014

3-Minute Swirl Slime

(4 Years)
We like most of the world are still singing, "Let It Go" and "Do You Wanna Build a Snowman?".  When I saw several Glitter Frozen-Inspired Slime recipes, I knew we were going to make a batch or two.  I decided to first follow this recipe from A Pumpkin and a Princess and then add more Borax to each new batch.

Glitter Slime
1/2 Cup of White Glue
1/2 Cup Water
1 tsp Borax
1/2 Cup Water, warm
Food dye or liquid water color
Glitter

Pour glue and 1/2 cup of water in a medium bowl, mix well.
In a small bowl, mix 1 tsp Borax with 1 cup of warm water.  Add food dye.
Pour the small bowl of colored Borax solution into the medium bowl.
It will begin to solidify.  Mix with your hands.  Drain the remaining water from the slime.
Pour glitter onto slime and knead in.
Have fun playing, and store it in Tupperware.


So... I asked my little kidabunks if they wanted to make slime.  Little Miss was bouncing up and down, "I do, I do!"  I quickly gathered the short list of ingredients.  Instead of purple or light blue slime, Little Miss wanted pink slime.  Shocker!  The girl loves pink.  Her bedroom walls are pink, her bedspread is pink, most of her dresses are pink, her soccer ball is pink, her T-Ball glove is pink, ok, you get the point.


While she was in the process of making slime, Wild One dragged over a kitchen stool and asked to make blue slime.  Do you notice the outfit?  Yes, we are in June.


Here are a few things that we learned while playing with this slime recipe.  
1- The glitter was actually expelled from the slime.  It wound up all over the trays, the table, the floor.  
2- This stuff STICKS to towels and clothes, and it's hard to pick and peel off.
3- Adding more Borax will create a stiffer slime.
4- It BOUNCES!  That's right, it bounces!
5- It's addicting.  


I loved the swirl.  However, after about ten minutes the swirl turned lilac.  That's when Little Miss said, "I think I made a mistake."  I asked why and she said that she wants just pink slime.  So within minutes she created a second batch of pink.

Quick and easy imaginative play.  Look at those smiles!  It's so much fun.