Friday, February 28, 2014

Mardi Gras Smoothie (Blueberry, Spinach & Frozen Banana)

(4 Years)

As part of my Pinterest Challenge and Natural Food Dye Project we decided to make the Mardi Gras Smoothie from Karyn at Pint Sized Baker.  So, her's is beautiful and mine well, it looks like this:

So what happened?  Why didn't it turn out like Karyn's?  I never read the post!  I just looked at the picture and said, ok I know what to do we make smoothies all the time.  How wrong I was!  Sorry, Karyn I was rushing- I should have read the post.

Even though it looked awful, and didn't even bear a slight resemblance to Karyn's, Little Miss said, "Mommy, I like this smoothie.  It looks like a monster rainbow smoothie."  I love that kid!  Although, when I tried taking a picture of her, she said "no pictures today Mommy".  Oh boy.  Wild One gulped down his and part of mine!  That boy loves his smoothies.

While the kids were drinking the smoothie.  I read the post!  Ohhhh, first blend the milk (we used almond) and frozen banana together (she also said to add a scoop of protein powder, but we don't have any in the house- so I left it out).  Then divide the banana milk into three servings.  Pour one serving back into the blender and add frozen blueberries (she used blackberries, we rarely have blackberries in the house, but we ALWAYS keep frozen blueberries in the freezer- blueberry muffins, blueberry pancakes, blueberries in smoothies, frozen blueberries to keep our drinks cold without watering them down).  Pour into a large glass.  Rinse blender.  Add second banana milk portion to the blender along with one cup of spinach.  Instead of fresh spinach, we used frozen (1/2 cup).  This didn't yield very much.  I should have added ice, like she said- slap to the forehead- I forgot.  So, this layer was very sparse.  It barely covered the blueberry layer.  Rinse blender.  Add remaining banana milk portion with some ice to the blender.  Blend until smooth and top off the glass.  Here's what our second try looked like:

It's getting closer.  I think if I added the ice to the spinach layer, it would have worked.  Third times the charm!  That will have to wait for another day, for today we are smoothies-out.  Karyn, thank you for sharing your layered smoothie!

Thursday, February 27, 2014

Sight Word Fun Using Clothes Pins (FREE Sight Word Checklist)

(4 Years)

I'm on Day Two of my Pinterest Challenge (see here).  Today we are going to practice this weeks sight words using clothes pins (yesterday we did a Trace It, Stamp It, Cut & Paste It board with the words).  Each week we are going to practice three or four new words and then review the words from the previous week(s).  This week our words are: THE, HAS, HIS, and SAID (since it comes up so often in our read alouds).

I put together a Sight Word Checklist for my kiddies.  It has 50 of the most used words on Pre-K and Kindergarden sight lists.  You can download it here for free!

Today's Pin came from Kelly at Imperfect Homemaking.  I already love this idea, and we haven't even done it yet.  It only takes minutes to create AND I had everything in the house already (markers, clothes pins and index cards)!  Plus, it's easy to store.
  
I invited Wild One over to play first (everything is more fun with a sword!)-


Little Miss came over and sat down ready to work.  She looked at the cards and the clothes pins and began putting them together.  I didn't even get a chance to explain what to do.  "I know, I know Mommy."  They are growing up so fast!


Thank you Kelly for a quick and easy learning activity for my little ones.

Wednesday, February 26, 2014

Pinterest Challenge & Sight Word Fun

(4 Years)

So... I'm addicted to Pinterest.  I enthusiastically pin with the anticipation that I'm going to actually do what I pinned.  Well, life gets in the way and there are a lot of pins on my board that I haven't tried yet.  Does that stop me from still spending hours searching for pins that I'd love to do?  Nope, I just keep pinning (guilt free hoarding).  Well, it's time to try all of those great ideas that are filling my boards.

Behold The Pinterest Challenge!  It's actually two parts:
The first part, is to update each pin with a post of our success (that's probably my teacher side coming out, share what works and what doesn't)- did it work, what went wrong, what we would change for next time, and hopefully if I documented it, a link to our post showing how we used the pin.
The second part, is to actually do what I pin (with a post of its success).
No more excuses, every day I need to either update a pin with a post of our success or complete a pin.  

Now, for today's Pinterest Challenge.  I chose to use Classroom Freebie's CVC Word Activity for our sight words.  It has stamping, it has cutting and it has pasting AND it looks easy enough to put together!  I just need ten minutes to set it up.  It was perfect timing, the kids were busy "reading", so I quietly slipped away.  I altered Diane's form slightly to fit our needs.  Instead of "write it" we have a "say it and trace it" column.  Other than that, it's basically the same.

Little Miss was so adorable; as she was tracing each letter, she said the letter slowly.  


Wild One was very quiet as he worked.  Before he glued his letters on the board, he placed each letter on the "trace it" word.  Hmmm, good idea.  I wish I thought of that.


The kidabunks really liked this activity, thank you Diane for a fun way to practice our sight words.  I know we'll be doing this again.  I'm glad we finally tried it.  One pin done.  A little less than 800 pins to go!


While Wild One was finishing up his work.  I gave Little Miss the left over strips of construction paper to glue.  I love how she immediately noticed that the strips are different sizes and she began pasting them in decreasing size order.  A few minutes later, she turned her upside down Christmas tree into a stick collage.


What a productive morning!  Sight word practice, tracing practice, stamping practice, cutting on the line practice, pasting practice and beautiful artwork!  Hmmm, I wonder which pin we will be working on tomorrow.

Monday, February 24, 2014

Yummy Pancake CVC Words

(4 Years)

We love pancakes!  Ok, who doesn't like pancakes.  We made a batch of pancakes using roasted chioggia (striped beets- isn't that a fancy name for striped beets?).  They looked so beautiful at our farmers market.  However, they didn't impart that beautiful, rich pink color to our pink pancakes (get our recipe here) that we normally get from red beets.  Oh well.  We still had fun.

Today, I decided to make some -AT word pancakes for the kidabunks.  Quick and easy, these words were a fun way to practice spelling.


Next time, we may create number pancakes.  Although, the Mickey Mouse pancakes are still our favorite.  Learning and food go so well together.  Have fun!

Friday, February 21, 2014

Rainbow Natural Food Dyes - an Alternative to Artificial Food Dyes

(4 Years)

We have been doing our best to keep artificial food dye away from our kids.  You would think this wouldn't be too difficult, but it can be.  Holidays and birthday parties are here every month, and with those festive occasions are the gorgeous rainbow-colored frostings, cakes, candies, cookies, yadda yadda yadda.  We've learned that as long as we are ALWAYS prepared, we can circumvent the inevitable looks of longing that my kiddies give when they see their friends eating desserts made with  artificial food dye.  In my purse, there are almost always six, yes six, Larabars (their absolute hands-down favorite packaged snack) that have always come to our rescue- eliciting cheers of happiness when I offer them instead of whatever is being served at the party.

At home we make pink pancakes (recipe and post here) and pink cupcakes (recipe and post here).  We've even made green mini cupcakes, thanks to Catherine at Weelicious.   However, I want to make those beautiful rainbow cookies and rainbow cakes, especially with Spring quickly approaching (Dr. Seuss Week, St. Patrick's Day and Easter will be here before we know it).  So my search was on for alternatives to artificial food dyes.

I told the kids that we were going on a rainbow expedition and each week we are going to try to make/bake something with one of the colors of the rainbow.  They are so excited.  We'll post what worked, and what didn't.   Meanwhile, here is a color tinting list:

Pinks- dark and light (not a true red- although, almost every site that I read through said that beets will turn your batter/frosting red)
beets- blended or juiced raw, or roasted, peeled and pureed
strawberries- blended or juiced raw
they are so delicious and you really, truly, cannot taste the beets

Orange
carrots- blended or juiced raw

Yellow
extra egg yokes

Green
baby spinach- blended or juiced raw
kale- blended or juiced raw

Blue
red cabbage with baking soda

Purple
blueberries- blended or juiced raw
blackberry juice
beets- blended or juiced raw, then mix in a pinch of baking soda

Brown
unsweetened cocoa powder (unsweetened dark cocoa powder will produce a much deeper, darker brown if that is preferred)

Happy Eating!

Thank you to my sources:
Kelsey at Itsy Bitsy Foodies
Catherine at Weelicious
Hungry Happenings
My Little Miss and Wild One for being my taste testers

Thursday, February 20, 2014

Pinkalicious Cupcakes - no artificial food dye

(4 Years)

These always make my kidabunks smile.  I'm not sure if it's the bright pink color or that we just baked a batch of cupcakes.  These are instant happy makers.  Don't worry you can't taste the beet.  Seriously, there is no beet taste and just LOOK at that color!

Are these "healthy"?  Well... there is a beet, a cup of milk, two eggs and whole wheat flour.  There's also butter, a lot of creamy, delicious butter.  Normally when we are baking muffins or making pancakes or waffles, we replace the butter with unsweetened applesauce or fat-free Greek yogurt.  However, this is a cupcake, a dessert- a once in a while treat, not a meal or part of a meal.  There's also sugar, an entire cup!  I rationalize it this way, there are no artificial flavors or colors in here, there are no chemical preservatives.  I can pronounce every ingredient.  Is it healthy though?  Nah, it is delicious.

Pinkalicious Cupcakes 
Makes 12 Cupcakes
Ingredients
1 large Beet, roasted, cooled and peeled (I do this a day ahead)
1 cup Milk, room temperature
1 cup Whole Wheat Pastry Flour (or 1/2 cup each of all-purpose and wheat flours)
1 cup Cake Flour (or 7/8 cup of all-purpose and 2 T corn starch)
1 T Baking Powder
1 t Kosher Salt
1/2 cup Butter, room temperature (softened)
1 cup Sugar, white or coconut
2 Eggs, room temperature

Directions
1.  Move oven rack to middle position.  Preheat the oven to 350 degrees.  Line muffin tin with cupcake liners.
2.  Place the roasted beet and milk in a blender, process until smooth.
3.  Sift together the flours, baking powder and salt onto a large paper plate.
4.  Beat the butter in a stand mixer on medium-high speed for about one minute, or until creamy.  Add the sugar and beat at low speed for 10 seconds (to incorporate the sugar into the butter), increase speed to high for about three minutes, or until light and fluffy.
5.  Turn off the mixer.  Scrape down the sides.   Resume mixing on medium-high speed, add one egg at time.  Beating well after each addition, about 30 seconds.
6.  Turn off the mixer.  Scrape down the sides.  Set the speed at low speed, pour 1/3 of the flour mixture, pour 1/2 of the beet puree.  Repeat, ending with the flour.  Beat until just combined, being careful not to over mix.  Turn off the mixer and remove the bowl.  Gently hand mix, scraping bottom and sides, just to combine.
7.  Pour into prepared liners.  Bake for about 20-25 minutes, or until a toothpick comes out with just a few crumbs attached.
8.  Allow to cool in the tin for about three minutes.  Remove the cupcakes to a cooling rack.  Allow to cool completely prior to frosting (if using).

We don't add frosting to these, they really don't need them.  You could add a little of the beet juice or puree to a cream cheese frosting, but we like them plain.  Now chocolate cupcakes ALWAYS get frosting.

Enjoy!

Wednesday, February 19, 2014

Easy Scissor Practice for Beginners

(4 Years Old)

Lately, it seems like the kids are always asking to work with their scissors (by lately, I mean for the past six months- as you can see I've taken a break from blogging- I don't know how you mom's do it all).  Anyway, I give all the credit to those wonderful, and free, paint chip cards. These little gems are perfect for little ones to practice using scissors.  The paper is a heavier weight than printer paper and construction paper, it doesn't bend when they are holding it to cut.  The smaller size is perfect for little hands to grasp.  It really is perfect for learning how to cut.  Most of the paint chip cards even have the white line dividing the colors, providing a perfectly straight line to cut on.

We began with the narrow paint chip cards with the white dividing lines.  To get them hooked on that "Mommy, look I did it!" feeling, I sliced the cards in half lengthwise.  They only needed to make a few cuts and they were able to cut through the card.

Once they were able to easily cut through the sliced cards, I gave them the entire card.  I'm glad we started slow, it built up their confidence to work on the larger cards.

We introduced scissors to Little Miss and Wild One right after they turned three.  At first, neither had any interest in cutting.  So, I put it away and tried again around 3 1/2.  It instantly became a favorite activity.  Since they have shown an interest, I provided a lot of opportunity to practice cutting.  We didn't just cut the paint chip cards, they love cutting straws:


 The straws make a POP sound as they fly off the base of the straw when cut.
Keep those smaller pieces of straw, see here for some math, science, prewriting and art activities.


Also play dough can be easy or challenging depending upon the thickness and width of the piece of dough.  When they were about 3 1/2, I would roll out the ropes of play dough for them and they would cut them.  Little Miss would cut (using the play dough scissors) so fast, I could barely keep up making her the ropes.

Today, I used some of the paint chip cards that we had lying around, and drew zig zag lines, wavy lines and a circle so that we could begin practicing cutting out shapes.  Little Miss liked how when she cut apart the zig zag lines they looked like crocodile teeth.  She kept saying, "tick tock, tick tock."

 Can you see the little card cuttings by his knees?  He decided to cut some of the left-over cards into "tickets".

This cutting activity was quick and easy (set up, was less than five minutes- including gathering materials and drawing on some of the cards; activity length- was a little less than ten minutes), and more importantly both kids liked it!  There is a lot of cutting in Pre-K (that's next year for us), so my plan is to work on cutting out shapes at least twice a month, unless they ask for it more often.  There are so many wonderful art projects that will keep this type of scissor practice fun.  The hard part, for me, is choosing which projects I think they may want to work on.  I'll keep you posted.  Have fun today!

Tuesday, February 18, 2014

Easy and Fun Numeracy and Subitizing Game

(4 Years Old)

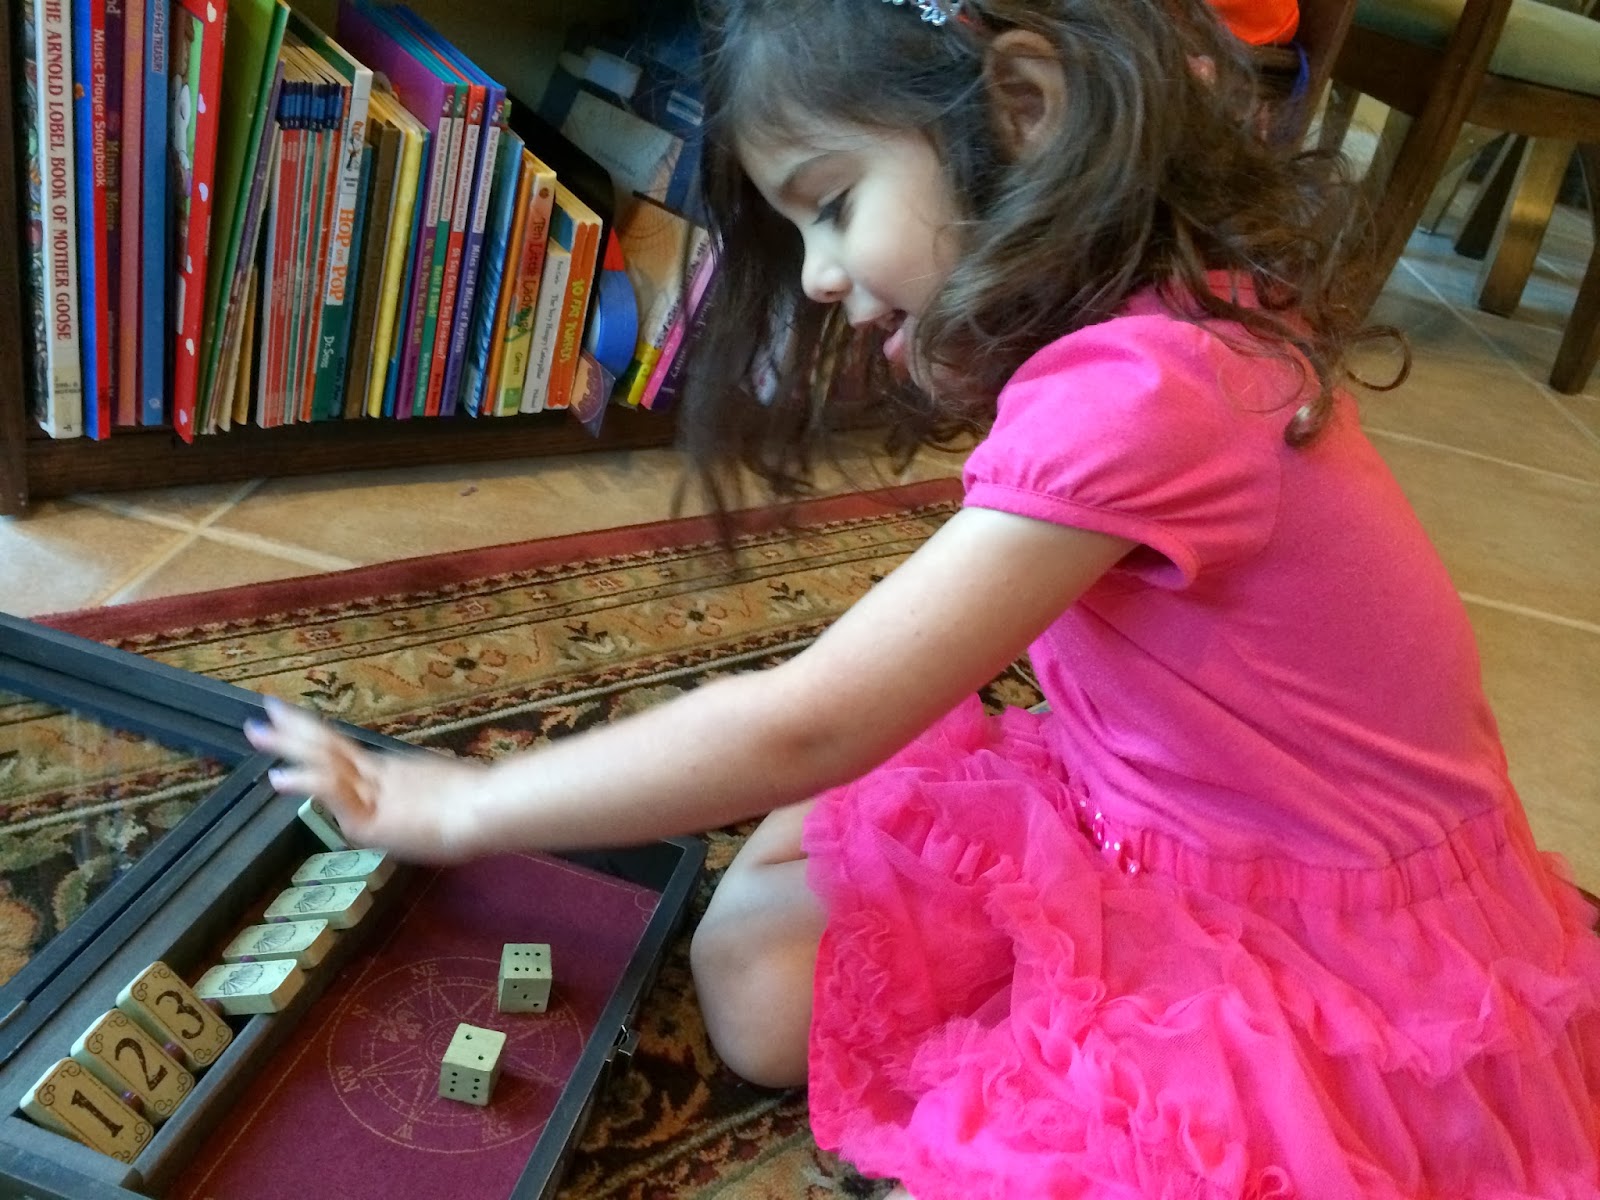
I love games, board games, tile games, card games, activity games.  I love them all!  I'm lucky that my kidabunks also love playing games as much as I do.  Grandma and Grandpa bought them Shut the Box! for their 4th birthday (thank you Grandma and Grandpa, they love this game).  Blah, blah, affiliate link provided.

I haven't read the directions on how to play.  I knew when I saw it what we'd be using it for.  First, subitizing (fancy name for being able to easily recognize a small number of objects without counting- like the number of dots on a die, you just know that a die showing two rows of three dots stands for the number six) and second learning how to add.

We start with all the numbers showing.  Then Little Miss rolls the dice.  She counts the dots on one die and we both say "plus" and next she counts the dots on the other die.  Then, we both say "equals" and she counts all the dots together.  For instance, if she rolls a three and a five, she would knock down the eight tile.  After a few minutes, she only had the numbers 1, 2, 3 and 9 left.  After she was able to knock down the nine, I removed one die.  She continued rolling until she Shut the Box!  She loved this game!  Every time she knocked down a tile, she would have a giant smile on her face.

Without saying anything, she began to notice that three dots always means three.  Yay!  By the end of the game she was able to subitize the numbers 1- 5!  What an easy and fun way to practice addition.  She had no idea we were doing a math lesson.  Learning through play - I wish everything was this easy.

Another fun way to practice subitizing is with dominos!  That's next on our list.